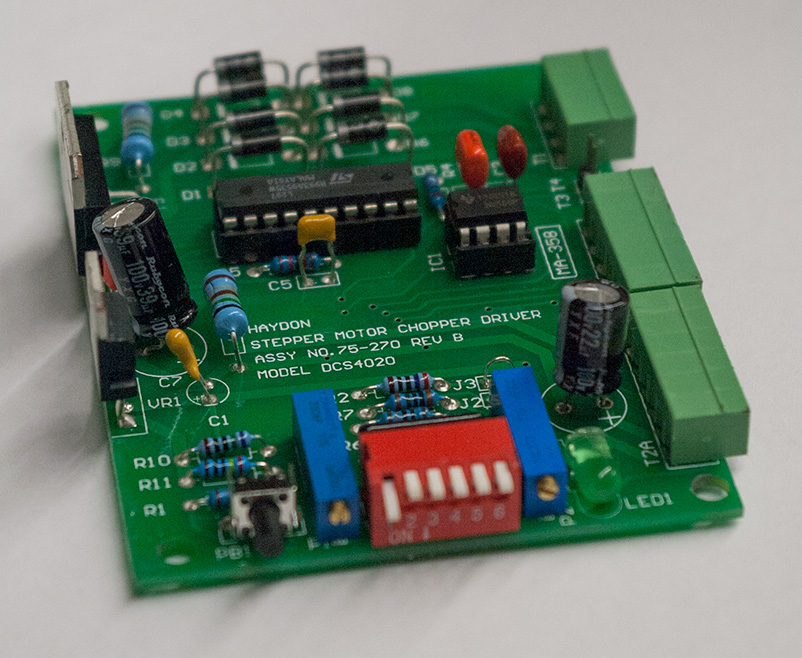
 One of the first steps in troubleshooting an electronic circuit board is to perform a visual inspection. We did this with a recent stepper motor driver that had failed and did not see any issues. The next step involved building a signature analysis test to perform some power-off diagnostics. This process took about a half-hour to get to the point where we could compare signatures from a working stepper motor driver to the failed one.
Upon running the signature analysis test on our trusty Huntron system, this interesting signature difference was detected at the voltage regulator VR1 indicating a significant change in the amount of capacitance at that point.
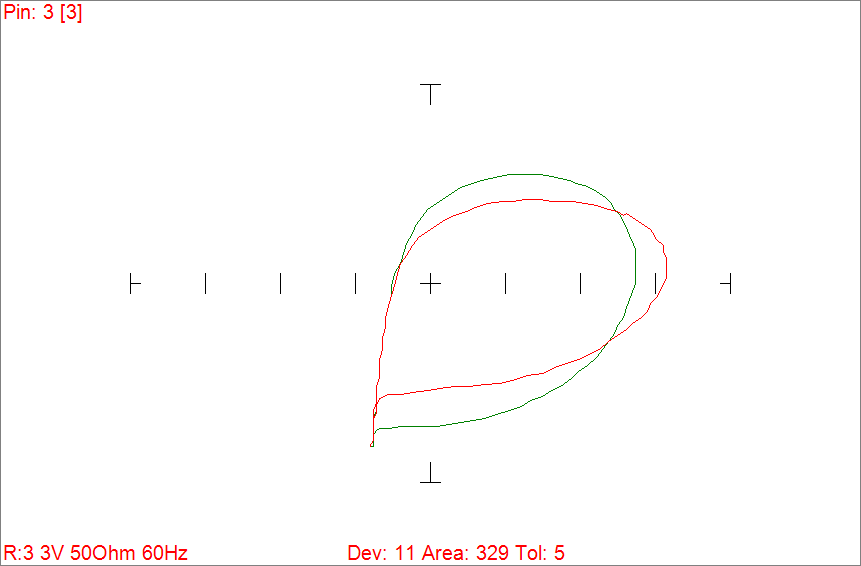
Signature difference at VR1 when comparing good PCB to bad PCB
The signatures tell us that the amount of capacitance has been reduced which can be the result of a missing or degrading capacitor. Okay. Time to take a second, closer look at the PCB.
Wait. What’s this?
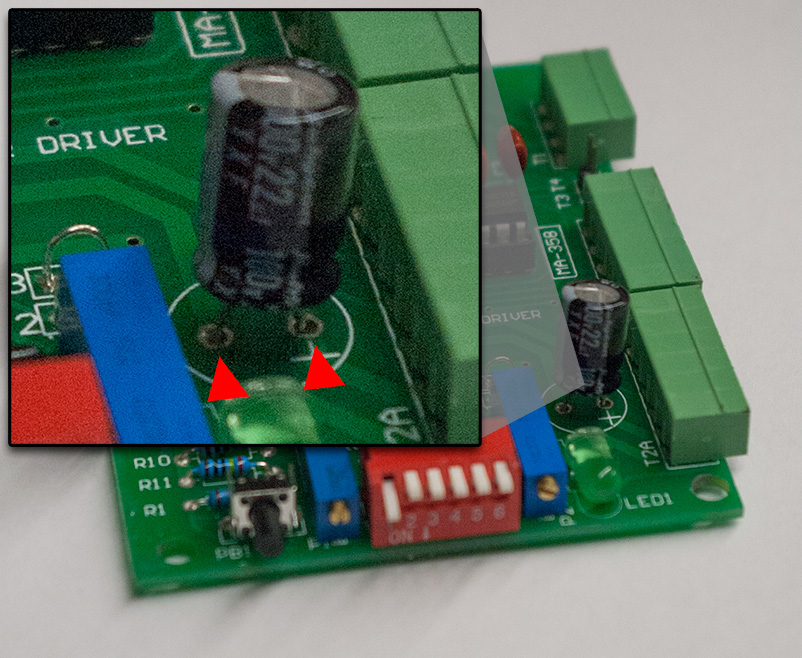
The red arrows point to sub-par solder joints.
Note that the solder quality of the joints beneath this electrolytic capacitor is less than perfect! How did we miss this problem? In our own defense, here are the solder joints on the solder side of the PCB looking directly from above. Not too bad.
The solder joints from this angle look okay.
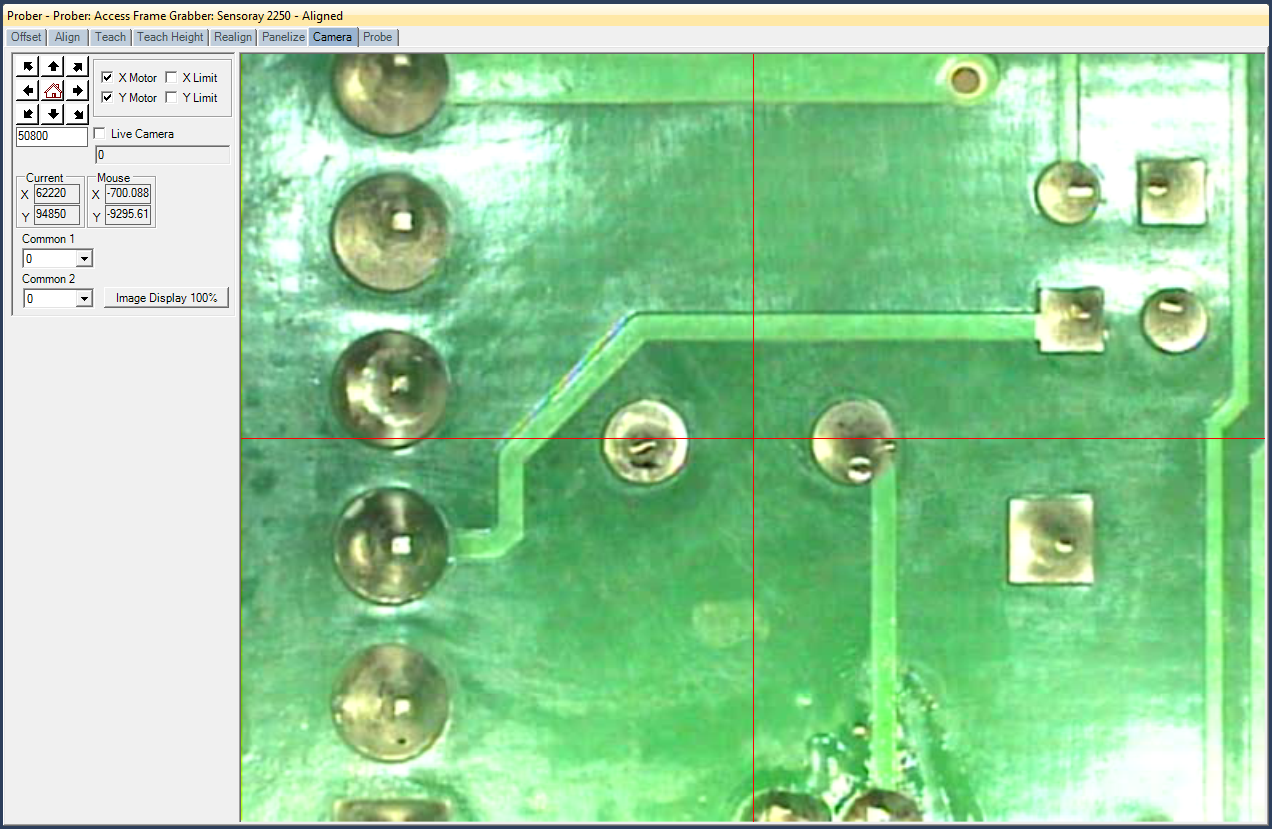
However, looking at them at an angle using our video microscope tells a different story.
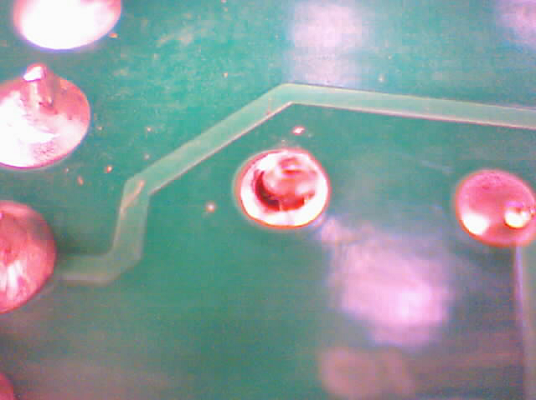
Broken solder joint on capacitor lead to PCB.
The broken solder joint was probably either intermittent or totally open at times. The electrolytic capacitor is used as one of the voltage line filters. So, with the cap essentially out of circuit, the amount of noise allowed on the voltage line caused the stepper motor driver to fail when in use.
Needless to say, a quick trip to the rework station and this joint as well as a few others were touched up and the PCB is now functional.
Next time, we will take the time to perform a closer inspection and save time in the end.
Visual inspection is the first step in repairing of electronic circuit board. The next step is building a signature analysis test and so on. More important is that, this blog post clear many of my doubts about circuit board inspection. Also, closer inspection on PCB can save our time during electronic circuit board repair/rework process.
Thanks for the comment, Bob. I couldn’t agree more about the value of PCB inspection. This particular case reinforced that idea.
Yes, the visual inspection is the first step in troubleshooting the electronic circuit board. I like the way of repairing the circuit board as illustrated in this post. Very informative post and help me a lot.